
Freelancer Headshots 101: A Beginner's Guide to Looking Professional on Any Budget
Your headshot is your visual handshake in the digital freelance world. It's the first impression potential clients get of you, often determining whether they'll even read your proposal or browse your portfolio. The harsh reality? You have seconds to make that impression count.
But here's the good news: you don't need to blow your budget on expensive studio photography to create a professional headshot that wins clients. Whether you're just starting your freelance journey or looking to upgrade your current photo, this guide will show you exactly how to get a headshot that showcases your professionalism without breaking the bank.
Why Your Freelancer Headshot Matters More Than You Think
Your headshot directly impacts your earning potential as a freelancer. Studies show that profiles with professional photos receive significantly more views and engagement than those without. When you're competing against hundreds of other freelancers for the same project, your headshot can be the deciding factor.
Think about it from a client's perspective: they're scrolling through dozens of proposals, often making split-second decisions about which freelancers seem trustworthy and professional. A high-quality, current headshot demonstrates that you take your business seriously and helps clients feel connected to you before any conversation begins.
For remote freelancers who may never meet clients face-to-face, your headshot becomes even more critical. It's often the only visual representation clients have of you, making it a key component of your personal brand across LinkedIn, your website, freelance platforms, and social media.
Your Three Budget-Friendly Options
You have three realistic paths to getting a professional headshot, each suited to different budgets and needs.
Professional Photography: The Premium Route
Hiring a professional photographer delivers the highest quality results, especially if you need large-format images for your website or promotional materials. Professional photographers understand lighting, composition, and how to bring out your best features.
The downside? This option typically requires the largest financial investment, often ranging from $200-$800 depending on your location and the photographer's experience. For freelancers just starting out, this might not be the most practical choice.
AI Headshot Generators: The Smart Middle Ground
AI headshot generators have revolutionized professional photography by making high-quality headshots accessible to everyone. These tools create professional-looking photos at a fraction of traditional photography costs, typically ranging from $29-$99.
AI headshots work particularly well for digital use cases like LinkedIn profiles, freelance platform photos, and website avatars. The process is simple: upload a few casual photos of yourself, and the AI generates multiple professional headshot options in various styles and backgrounds.
DIY Photography: The Bootstrap Option
Taking your own headshot using a smartphone is the most budget-friendly approach, requiring minimal financial investment beyond what you already own. With the right setup and techniques, you can create a professional-looking headshot for under $50 in additional equipment.
This option works best for freelancers comfortable with a bit of trial and error, and those who only need the headshot for digital platforms rather than large print formats.
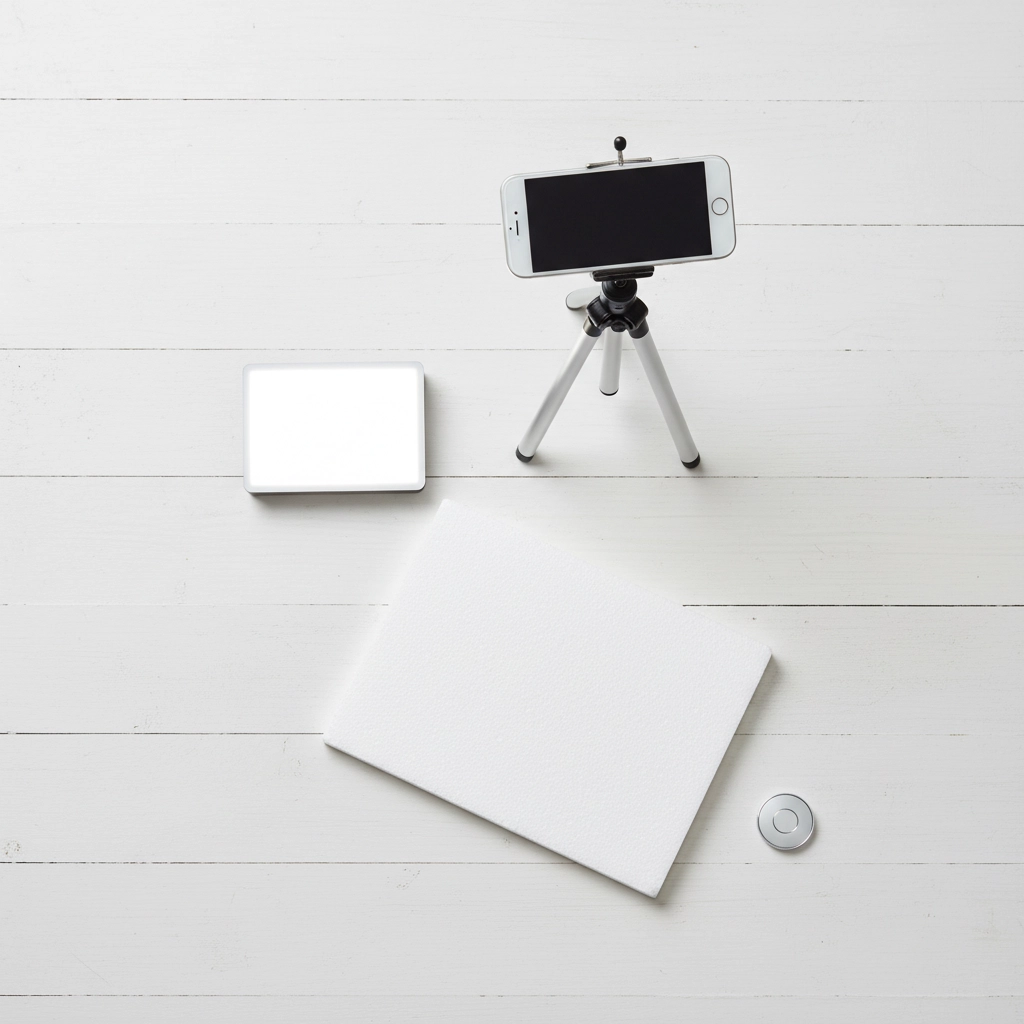
Setting Up Your DIY Home Studio
If you're going the DIY route, here's everything you need for a professional-looking setup:
Essential Equipment:
- Smartphone with portrait mode capability
- Tripod or stable surface for your phone
- Small LED light panel ($20-30) or access to natural light
- White poster board or reflector ($5-10)
- Plain background (existing wall works fine)
Lighting Setup: Position yourself near a large window with soft, diffused natural light. Avoid direct sunlight, which creates harsh shadows. If natural light isn't available, use your LED panel positioned at a 45-degree angle to your face, with the white poster board reflecting light back to eliminate shadows.
Background Considerations: Choose a clean, uncluttered background that contrasts with your clothing. A plain wall works perfectly, but make sure there are no distracting elements like picture frames, cluttered shelves, or busy patterns behind you.
Taking the Perfect DIY Headshot
Camera Settings and Positioning: Set your smartphone to portrait mode if available, which creates a professional depth-of-field effect that blurs the background. Position the camera at eye level – never shoot from below, as this creates an unflattering angle.
Frame yourself from mid-chest up, ensuring your entire head (including the top of your hair) is visible. Leave some breathing room around the edges rather than cropping too tightly.
Timing and Multiple Shots: Use your camera's self-timer or burst mode to take multiple shots. This gives you time to adjust your expression and position between photos. Take at least 20-30 photos – you'll be surprised how much difference small changes in expression and angle can make.
Expression and Eye Contact: Look directly at the camera lens, not the screen. Practice a genuine, warm smile that reflects your personality while maintaining professionalism. Think about something that makes you genuinely happy – this creates natural, authentic expressions that clients respond to positively.
Styling Your Professional Image
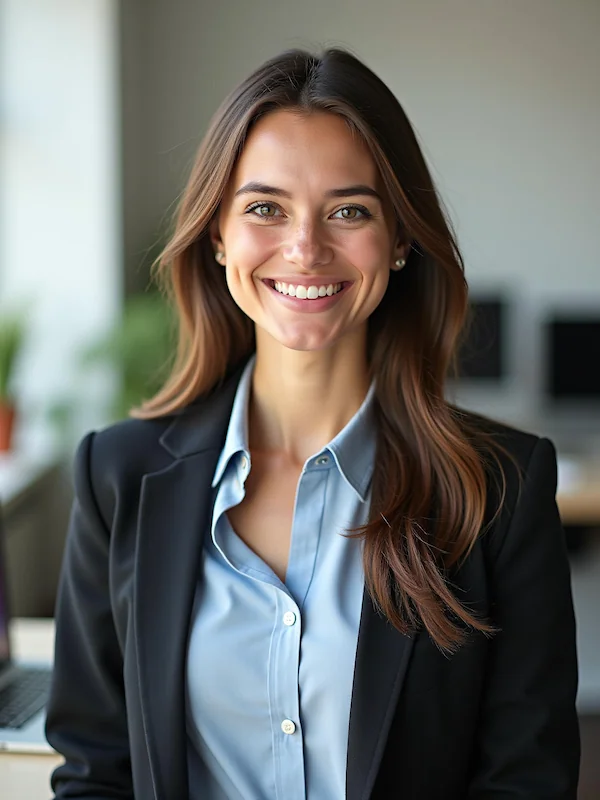
Clothing Choices: Your outfit should reflect your industry and target clients. For most freelancers, business casual works well – think button-down shirts, blazers, or professional sweaters. Avoid busy patterns, overly bright colors, or clothing that might date your photo quickly.
Choose colors that contrast with your background and complement your skin tone. Solid colors photograph better than patterns and keep the focus on your face.
Grooming and Appearance: Pay attention to details that matter on camera. Ensure your hair is styled neatly, and if you wear makeup, apply it slightly heavier than usual since cameras tend to wash out subtle tones.
For men, consider a fresh shave or neatly trimmed facial hair. For everyone, check that clothing is wrinkle-free and fits properly – ill-fitting clothes are immediately noticeable in headshots.
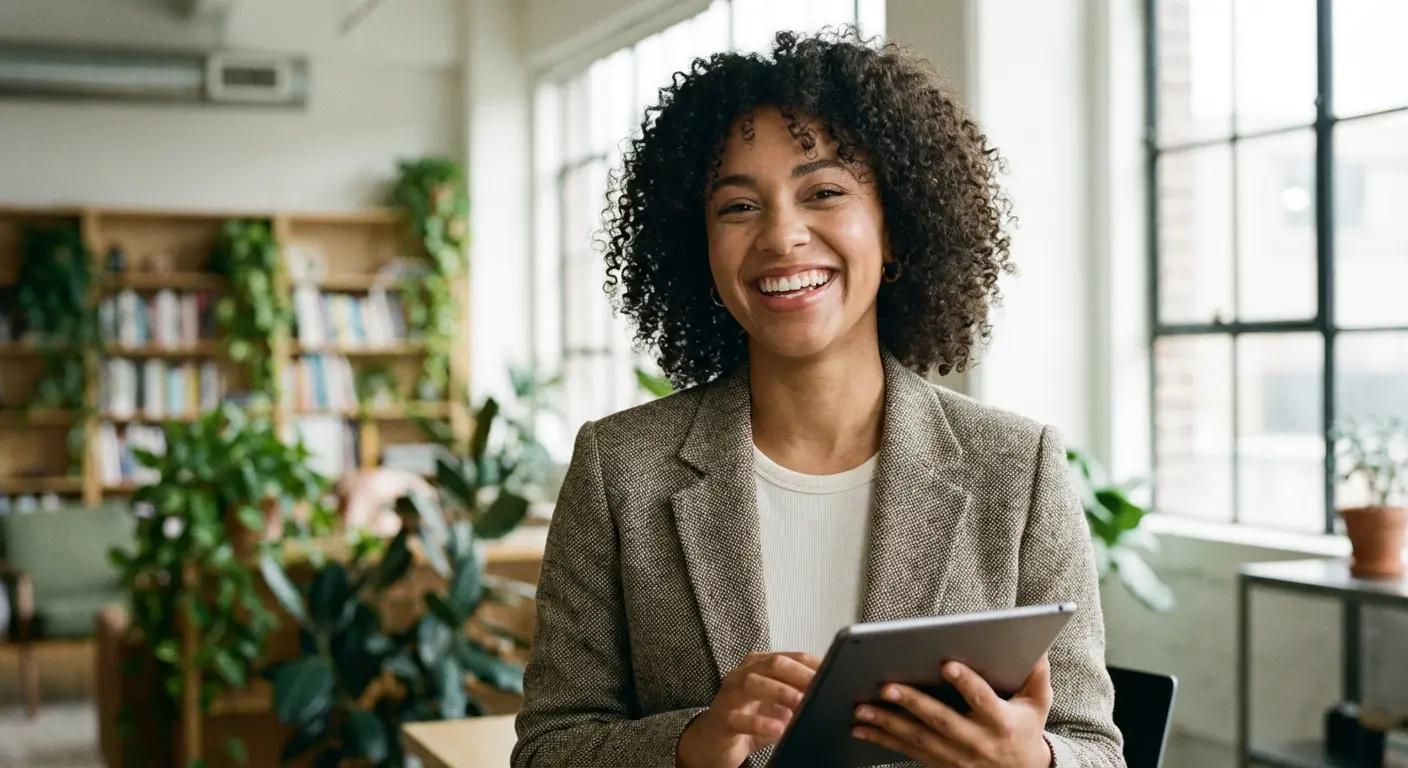
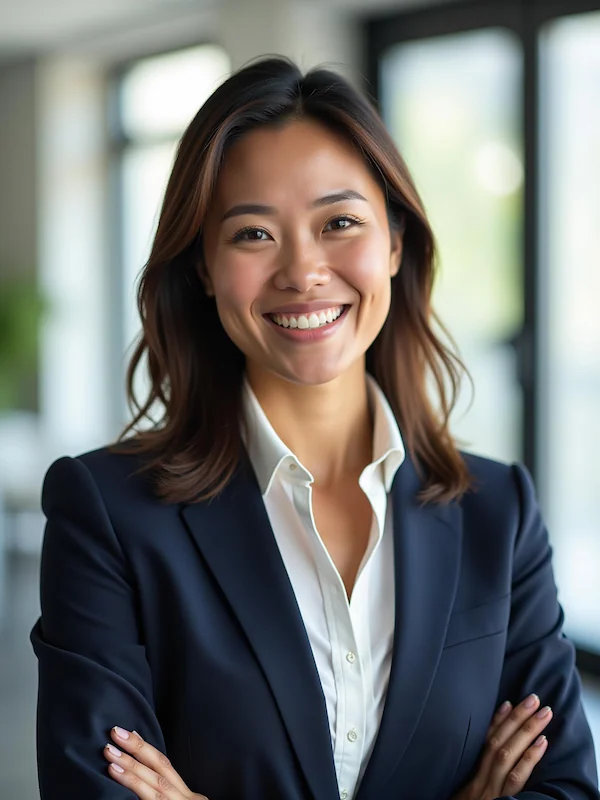
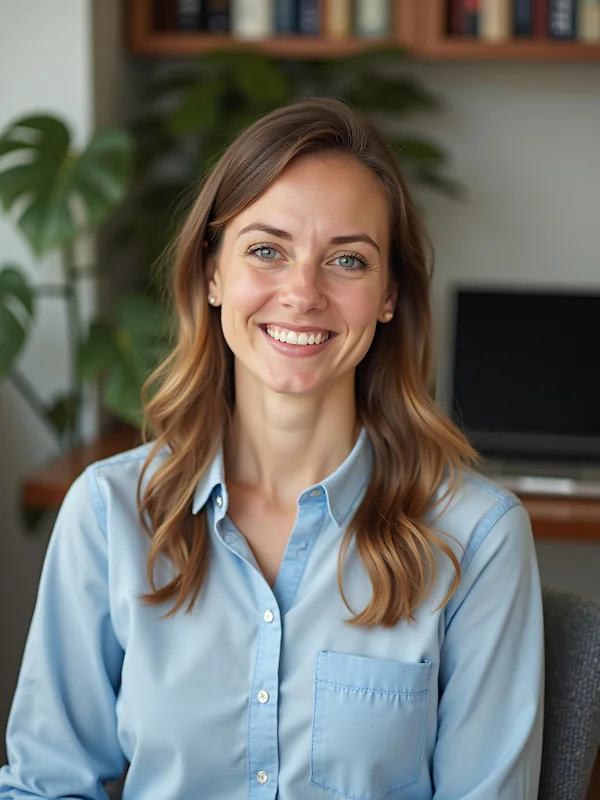
What Makes a Headshot Work for Freelancers
Technical Quality Standards: Your headshot should be sharp, well-lit, and high-resolution enough for various uses. Ensure your face is clearly visible without heavy shadows or overexposure. The image should be in color rather than black and white, as color photos perform better on most platforms.
Personality and Approachability: The best freelancer headshots balance professionalism with approachability. You want to appear competent and trustworthy while also seeming like someone clients would enjoy working with. Your expression should be confident but not intimidating.
Consistency Across Platforms: Use the same headshot (or shots from the same session) across all your professional platforms. This creates brand consistency and helps clients recognize you whether they find you on LinkedIn, your website, or freelance platforms.
When to Upgrade Your Approach
Start with Budget Options: If you're new to freelancing or working with limited funds, don't let the lack of a professional photographer stop you. A well-executed DIY headshot or AI-generated photo demonstrates professionalism and helps you start building your brand immediately.
Scale Up as You Grow: As your freelance business grows and you need larger format images for websites, business cards, or promotional materials, consider investing in professional photography. But remember – the goal is always to present yourself professionally, regardless of which method you choose.
Regular Updates: Update your headshot every 2-3 years or whenever your appearance changes significantly. An outdated photo can create trust issues when clients eventually meet you or see you on video calls.
Ready to create a professional headshot that wins clients? Explore ProfileHero's AI headshot generator to get studio-quality photos in minutes, not hours – perfect for freelancers who need professional results on a professional timeline.